Don’t worry! We just need a little extra steps to transfer DVD to FCP X on Mac through ripping DVD to FCP X compatible video format, like ProRes. For this goal, we need a user-friendly DVD Ripper - Pavtube BDMagic for Mac. This DVD Ripper can easily rip and backup DVD to FCP X no matter it is encrypted DVD disc or unencrypted family DVD video with ultra fast speed. It enables you to merge several video clips into one file or trim a overlong video to a shorter one. (If you want to preserve multi-track from DVD ISO image file, you maybe should select Pavtube ByteCopy.)
Free download and install:


Other Download:
- Pavtube old official address: http://www.pavtube.cn/blu-ray-ripper-mac/
- Cnet Download: http://download.cnet.com/Pavtube-BDMagic/3000-7970_4-76177782.html
How to import DVD to Final Cut Pro X in ProRes format?
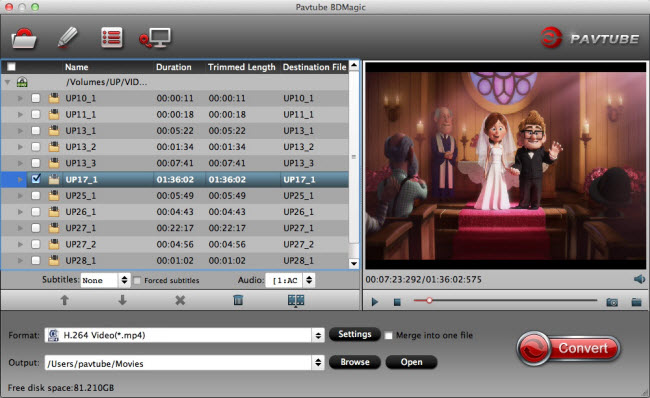
Step 1: Add DVD video to software
Run DVD to FCP X Software on your Mac and load your DVD video by clicking the “File” icon. This programme automatically choose the main video content to rip but If you have several clips and want a whole video, tick all the clips and then mark “Merge into one file” underneath the preview window.
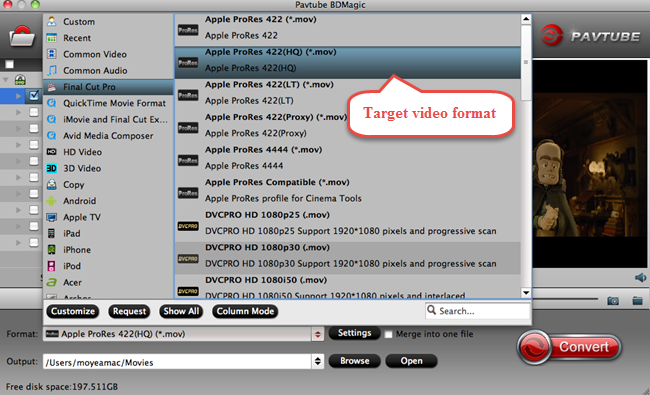
Step 2: Select target video format
Click the format bar to navigate to “Final Cut Pro” and then”Apple ProRes 422 (HQ) (*.mov)”. (Learn Apple ProRes Codec Types)
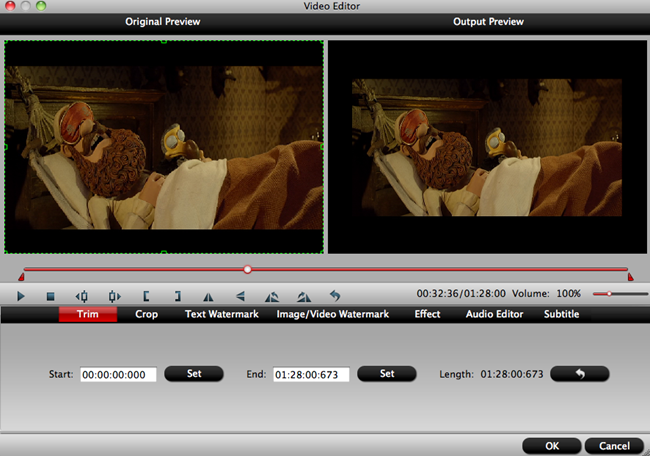
Tip: If your video is overlong or you just want some certain fragment, you can use the built-in video editing tool to trim video footage.
Step 3: Start DVD to Final Cut Pro X conversion
After choosing the right and suitable video format for Final Cut Pro X, click the big red button on the right-bottom of the interface to start conversion from DVD to Final Cut Pro X.
After conversion, run Final Cut Pro X on your Mac, and click “File” and “Import” to load the ripped video to Final Cut Pro X. Then you can edit your fovarite movie and make a personal edition blockbuster. If you wants more to show on your YouTube as a “Hollywood Director”, you even could backup your Blu-ray to Final Cut Pro X on the shelf to create more higher quality movie.
Related Articles:
No comments:
Post a Comment